![<?echo $_SERVER['SERVER_NAME'];?>](/template/twentyseventeen/skin/images/header.jpg)
Hello, everyone! I am Lyndsey Stanfill, and I am sharing how I adjusted the Camp Shirt sleeve pattern to add cap-height.

Assessing cap-height fit
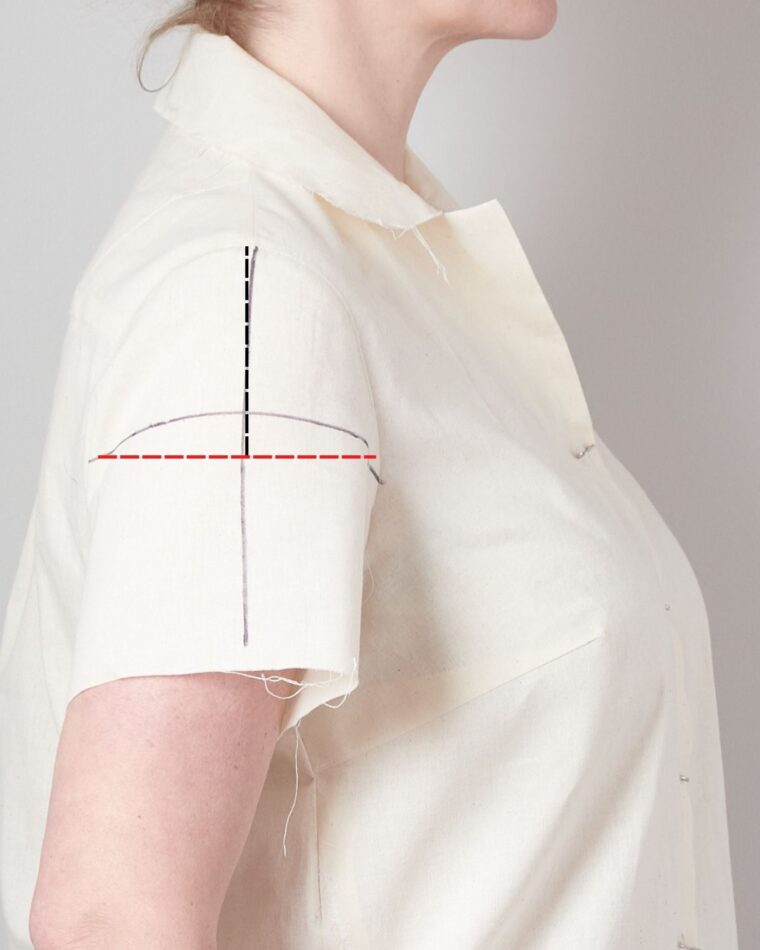
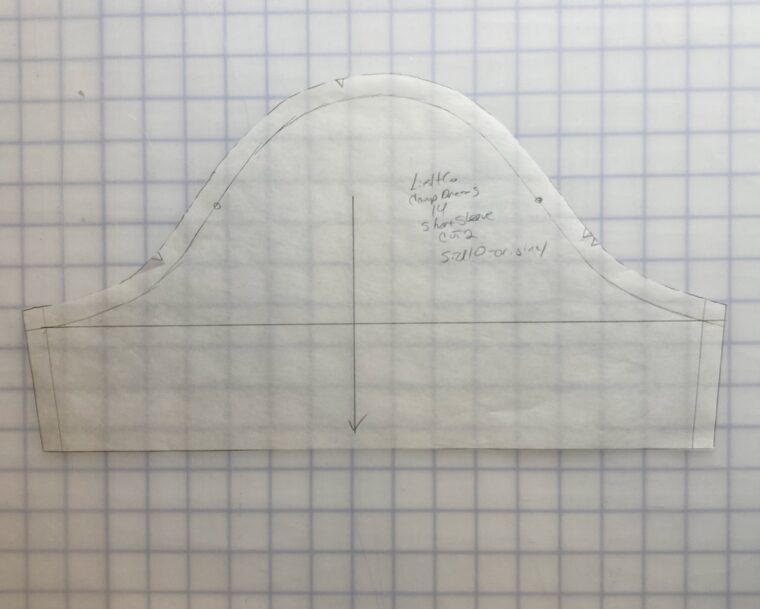
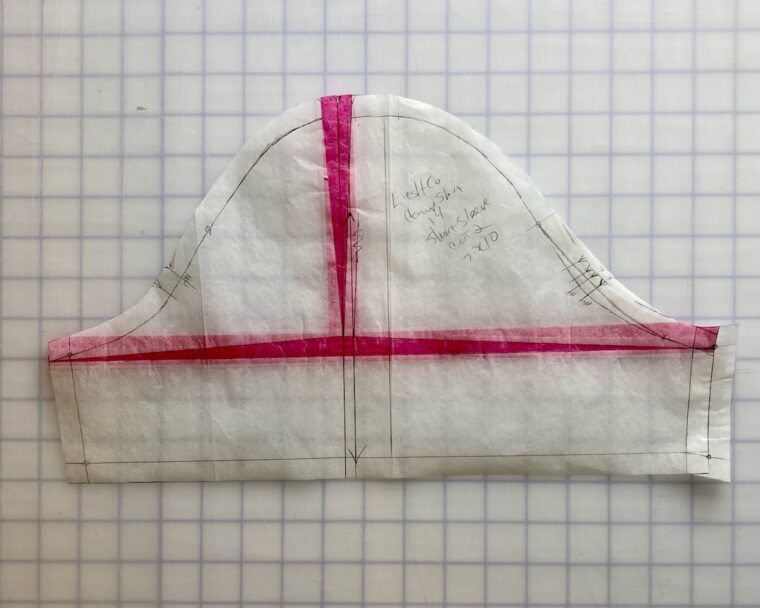
When sewing the muslin for my Camp Shirt, I had a great fit in the bodice but some tightness in the sleeve. I could pinch about 1.5″ of ease in the sleeve at the bicep, so I didn’t need a full bicep adjustment. However, my muslin sleeve had drag lines that pointed to the top of the sleeve, which usually indicates the need for additional cap height. To assess, I drew the grainline and bicep line in marker.
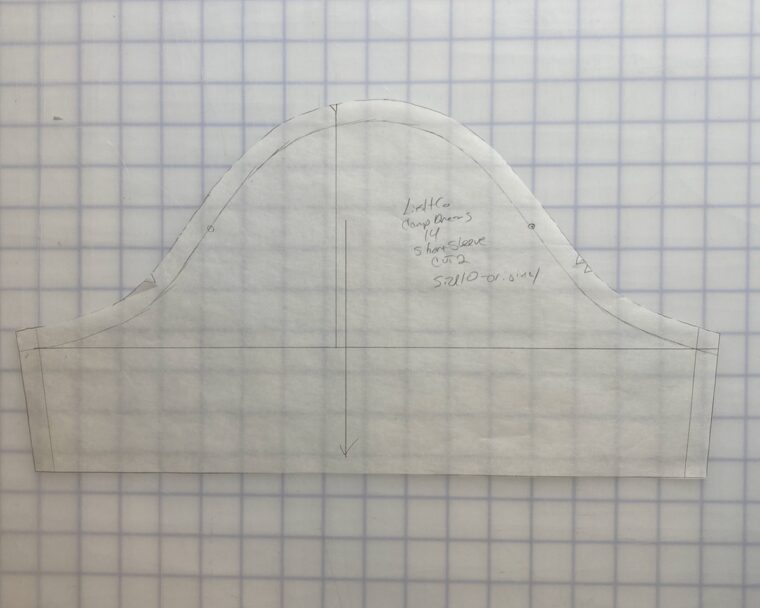
The cap height is the distance between the shoulder point and the bicep line. I’ve added two reference lines in the photo below. The red line represents where the bicep line should fall. The bicep line should be perpendicular to the grainline and parallel to the ground. Instead, the bicep line arcs up and does not stay parallel to the ground. The black line represents the new cap height-I need to make a 1/2″ adjustment.
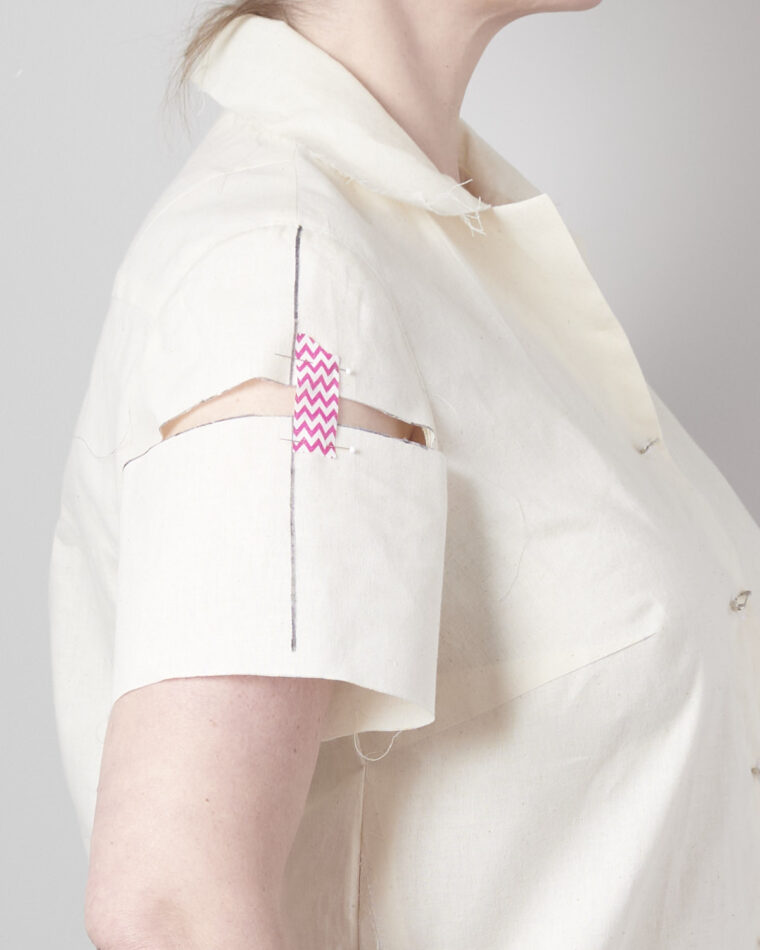
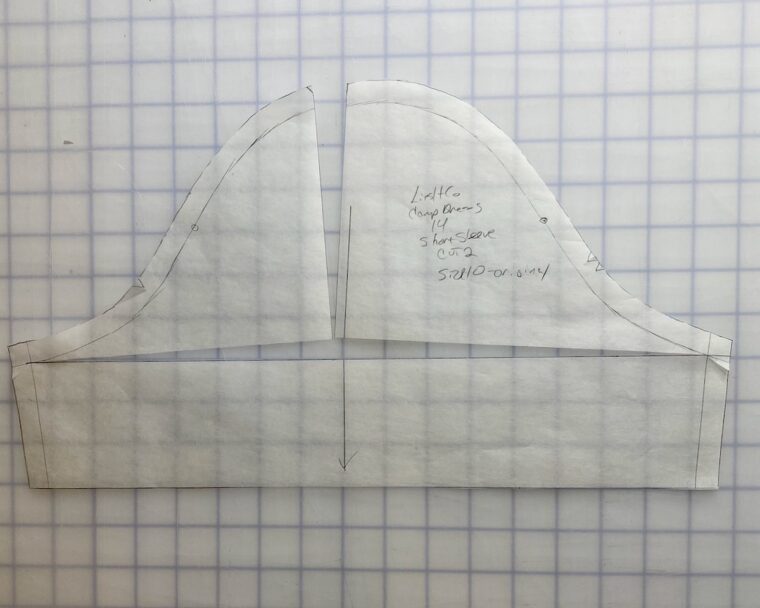
Another way to assess how much additional cap height is needed is to slash the bicep line and let the bottom of the sleeve fall until it becomes parallel to the ground. In the photo below, I have slashed the original bicep line and have allowed the bottom of the sleeve to drop 1/2″. When I make the flat pattern adjustment, I am essentially adding the space created between the slashed lines.
Cap Height Pattern Adjustment
Step 1
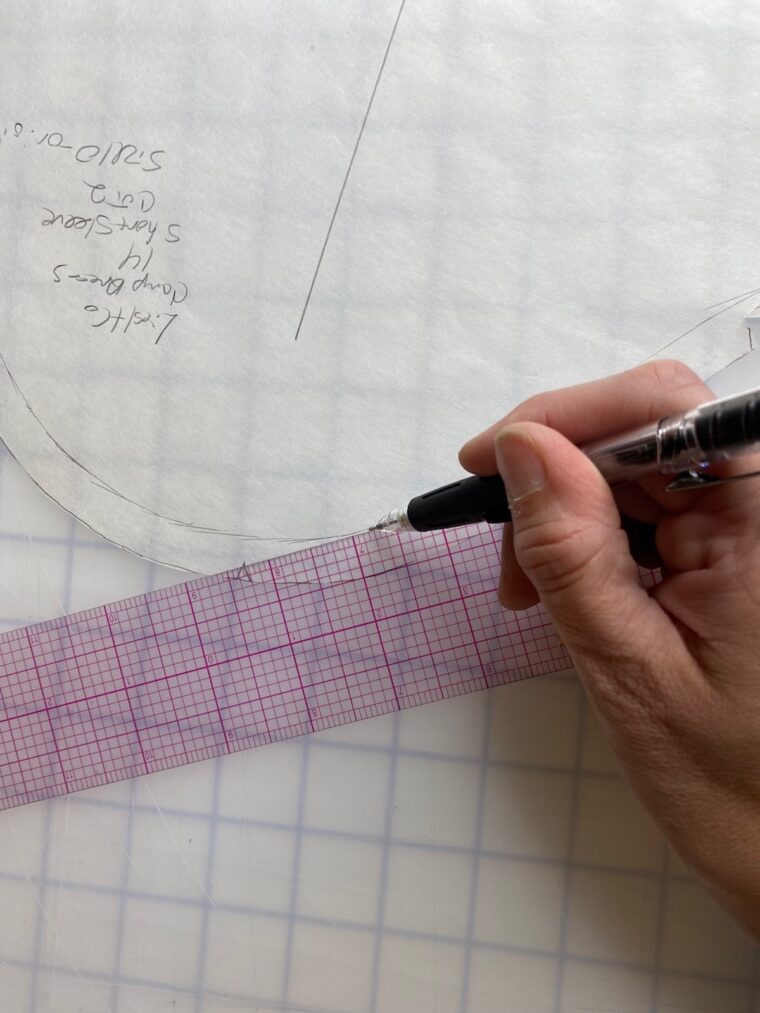
Draw stitching lines on the pattern equal to the width of the seam allowance. For example, the Camp Shirt has a 1/2″ seam allowance.
Step 2
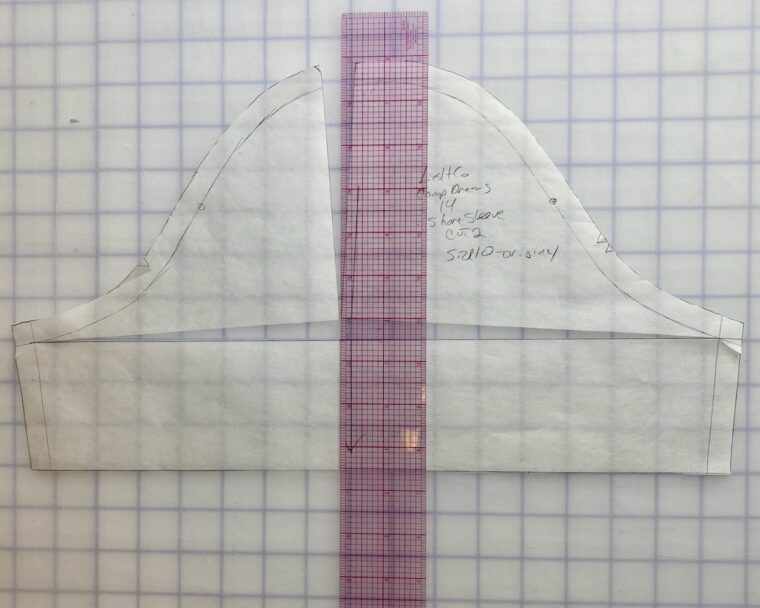
Draw a horizontal bicep line (perpendicular to the grainline) from one underarm point to the other. This is why we drew the stitching lines first. The bicep line does NOT extend into the seam allowance.
Step 3
Draw a vertical line (parallel to the grainline) from the shoulder point to the bicep line in Step 2.
Step 4
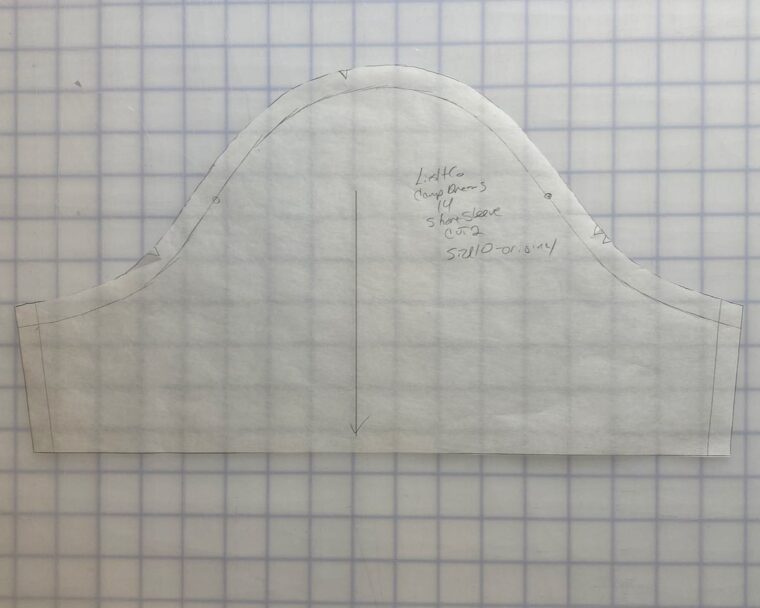
Slash the pattern along the bicep line but not through the seam allowance. Make a second slash on the vertical line. The vertical slash will continue through the seam allowance. Spread the pattern pieces to create 1/2″ additional height.
Step 5
Add tissue paper under the slashed areas and tape the pattern securely. You’ve now added 1/2″ to your cap-height. Notice you have also added sleeve cap ease, which will need to be eased into the armscye.
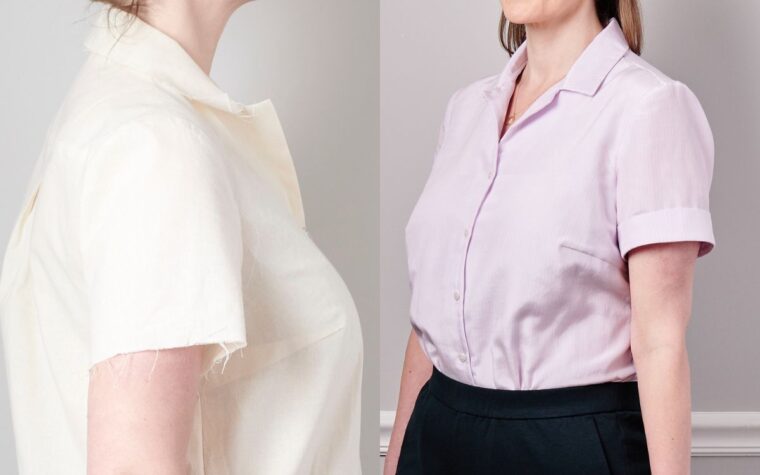
Adjusted sleeve
The adjusted sleeve fits much better. I no longer have tightness in the sleeve, and there are no longer drag lines pointing to the top of the sleeve.
(adsbygoogle = window.adsbygoogle || []).push({}); Â
Beige Color Grounding Pillowcase
Antibacterial Pillow Case,Grounding Pillow Case,Conductive Grounding Pillowcase,Conductive Antibacterial Pillowcase
Shandong EMF New Material Technology Co., Ltd , https://www.earthingsilver.com